Light & Airy Chocolate Sponge Cake

A delicate, bakery-quality chocolate sponge layered with homemade raspberry jam and chocolate whipped cream — light, airy and perfectly balanced.

This light and airy chocolate sponge cake has been my favourite celebration cake for years. I discovered this particular method during a weekend of testing when I wanted a delicate layer cake that felt weightless but still had a deep chocolate hit. The sponge itself is feather-light: you can see the air pockets when you slice it, and the crumb melts on the tongue. Paired with a tart raspberry jam filling and chocolate whipped cream, the whole combination becomes an elegant, balanced dessert that never feels too heavy after a big meal.
I first made this recipe for a small birthday party, and watching my friends reach for seconds was the moment I knew I had something special. The trick lies in the texture: whipping the whites until stiff yet glossy, gently combining the yolk mixture without knocking out the air, and brushing the baked layers with a simple syrup so the cake stays tender. It’s a method that rewards patience and a light touch, and when the cake comes together the way it should, it feels like magic — airy, slightly springy, and impossibly tender.
Why You'll Love This Recipe
- Light enough to enjoy after a rich meal yet flavourful — chocolate intensity without dense heaviness, perfect for layered desserts.
- Quick active time: about 15 minutes of prep and 20 minutes of baking, so you can have fresh layers in under an hour before cooling.
- Uses pantry staples — all purpose flour, cornstarch, cocoa, sugar and eggs — no exotic ingredients required.
- Make-ahead friendly: bake the layers a day in advance and store wrapped; assembly and decorating take minimal time.
- Versatile finishing options — swap the jam or cream for different flavours for birthdays, afternoon tea, or special occasions.
On the first day I served this with homemade jam, my family immediately appreciated the bright contrast between the tart raspberry and the gentle cocoa in the sponge. It’s an accessible technique that consistently produces bakery-quality results at home.
Ingredients
- Sponge Base — Flour & Cornstarch: Use regular all-purpose flour and cornstarch to mimic the light crumb of cake flour. Measure by spooning into a cup and level off for accuracy. These two together create the tender structure without heaviness.
- Cocoa & Coffee: Unsweetened cocoa powder (about 2 tablespoons) provides the chocolate flavour while 1 teaspoon of instant coffee deepens and rounds the cocoa without adding a coffee taste.
- Eggs: Four large eggs separated — whites for lift, yolks for richness. Room-temperature eggs whip more easily and produce better volume.
- Sugar: 2/3 cup granulated sugar total, split between whites and yolk mixture — this stabilizes the meringue and sweetens the batter properly.
- Oil & Vanilla: A neutral oil like canola (2 tablespoons) keeps the crumb moist without weighing it down; 2 teaspoons vanilla adds aroma and warmth.
- Simple Syrup: 1/4 cup sugar plus 1/4 cup boiling water — used to brush the layers so they stay tender and moist.
- Chocolate Whipped Cream: 2 cups cold heavy whipping cream whipped with powdered sugar and cocoa for a silky, chocolatey frosting that holds shape but remains light.
- Raspberry Jam: Use a homemade or high-quality raspberry jam as the tart counterpoint; it brightens the final dessert and lifts the cocoa beautifully.
Instructions
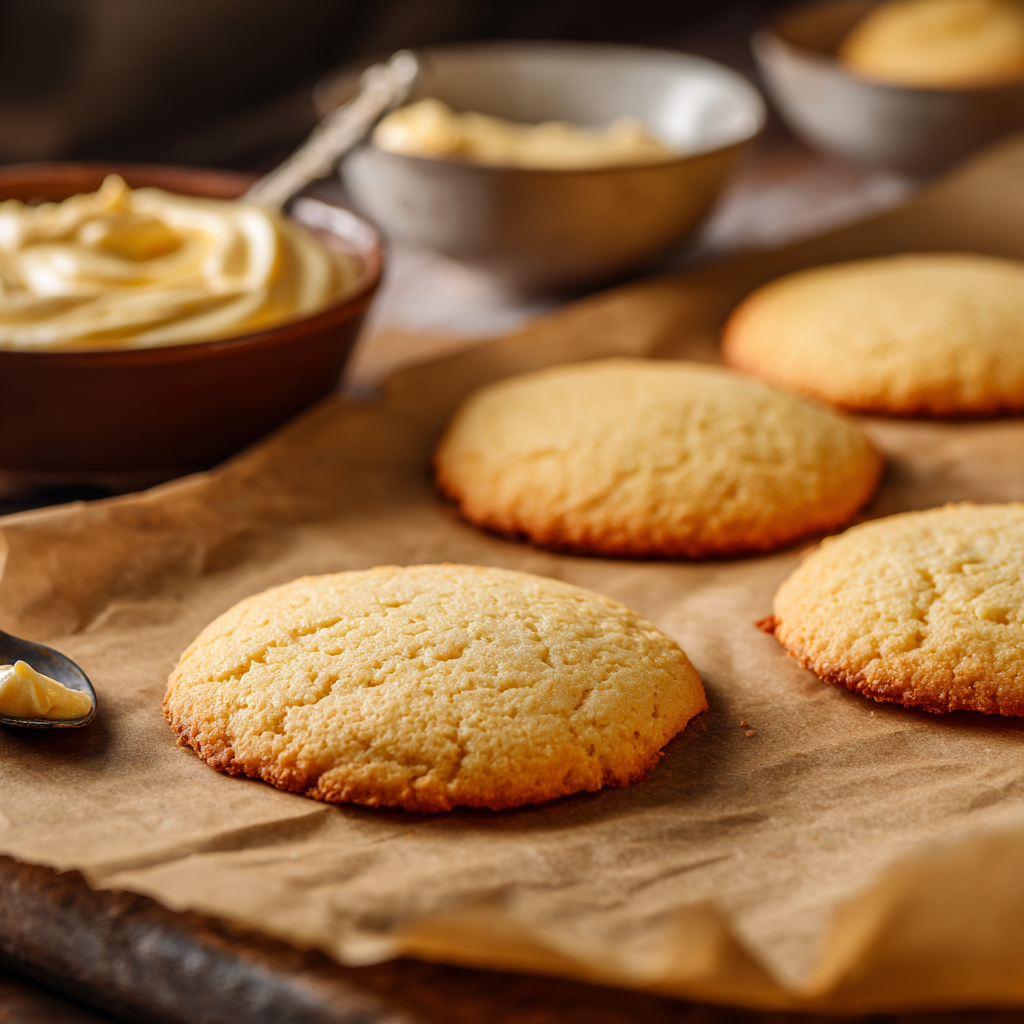
Preheat and Prepare Pans: Preheat oven to 320°F (160°C) fan. Line the bottoms of two 8x3 inch cake pans with baking paper; leave sides ungreased to allow batter to cling and rise. If you don’t have a fan oven, use 347°F (175°C) instead. Proper pan prep ensures even rise and prevents shrinkage. Combine Dry Ingredients: Whisk together 2 tablespoons all-purpose flour, 1/3 cup cornstarch, 1/4 teaspoon baking powder, 2 tablespoons unsweetened cocoa, 1 teaspoon instant coffee, and 1/4 teaspoon salt. Mixing the dry blend evenly avoids lumps — no need to sift yet but do check for cocoa clumps. Whip Egg Whites: In a clean bowl, whisk 4 egg whites with 1/8 teaspoon white vinegar until foamy. Gradually add 1/3 cup of sugar and whip on medium-high until stiff, glossy peaks form — roughly 3–4 minutes total. The vinegar stabilizes the meringue and helps retain structure during folding. Whip Egg Yolks and Incorporate Sugar: Combine remaining 1/3 cup sugar with 1½ tablespoons warm water, stir until moistened. Add 4 egg yolks and 2 teaspoons vanilla; whip on medium-high for about 4 minutes until thick and ribboning. Lower speed for 1 minute to reduce large bubbles — this staged whipping stabilizes the batter. Stream in Oil and Fold: With the mixer on medium, slowly stream 2 tablespoons neutral oil into the yolk mixture to emulsify. Gently fold half the whipped whites into the yolk base to lighten it, then sift in the dry ingredients and fold until just combined. Finish by folding in remaining whites carefully to preserve air. Bake and Test: Divide batter evenly between pans, tap lightly to dislodge big bubbles and run a toothpick through the surface. Bake for 20 minutes; done when a slight indent springs back slowly and a toothpick comes out clean. Immediate tapping and cooling upside down prevents collapse and keeps the crumb even. Cool and Trim: Tap pans on the counter from about 4 inches high and invert pans onto a wire rack while still inside the tins to cool for about an hour. When fully cooled, run a thin knife around the edges and turn layers out; trim any darker crust if desired for a neat finish. Simple Syrup & Brush: Stir 1/4 cup sugar into 1/4 cup boiling water until dissolved. Using a pastry brush, generously apply syrup to top and sides of each sponge layer to lock in moisture — particularly important since sponges are low-fat and can dry quickly. Whip the Cream: Whip 2 cups cold heavy cream with 3 tablespoons powdered sugar, 3 tablespoons unsweetened cocoa, and 1/2 teaspoon vanilla to stiff peaks. Watch closely and stop as soon as peaks are stable to avoid breaking the emulsion into butter. Assemble the Cake: Place one layer down, spread a thin, even layer of raspberry jam, arrange halved strawberries as desired, then cover with a generous layer of chocolate whipped cream. Top with the second layer and finish with more cream and decorative strawberries. Chill briefly to settle before slicing.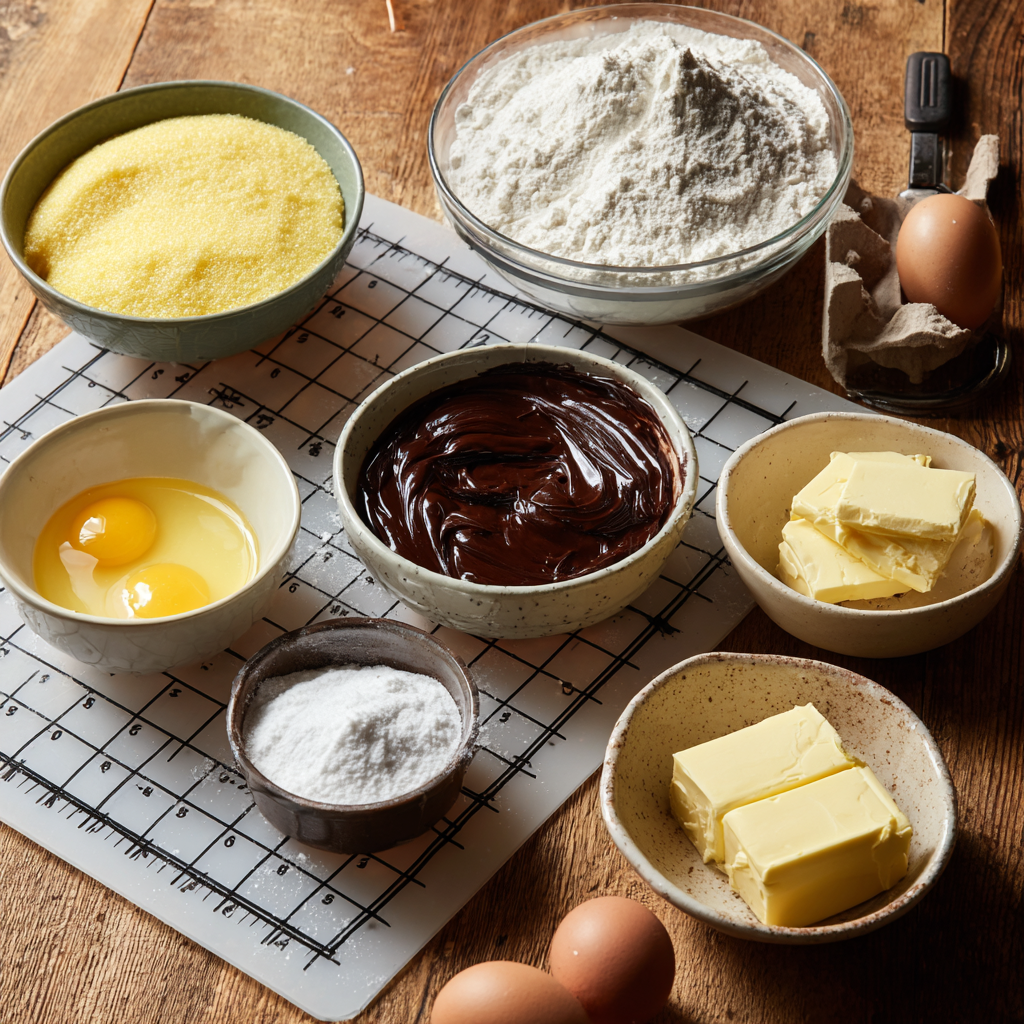
You Must Know
- Because this sponge contains little fat, brush each layer with simple syrup to preserve tenderness — stores best when brushed and wrapped.
- Store in the refrigerator for up to 3 days; for longer storage, freeze unfilled layers up to 3 months wrapped tightly.
- High in calories per slice but balanced by light texture; one serving is approximately 303 kcal with 30 g carbohydrates and 19 g fat.
- Watch egg-white peaks closely; underwhipping yields collapse, overwhipping becomes dry and loses elasticity.
My favourite aspect is how the tartness of raspberry jam cuts through the cocoa in a way that keeps each bite lively. Friends have commented that the cake feels ‘classic’ yet modern — perfect for afternoon tea or a special celebration. The technique trains you to be gentle and deliberate, and that care shows in the final, delicate crumb.
Storage Tips
After assembly, refrigerate the cake covered with a cake dome or large airtight container to prevent the whipped cream from absorbing fridge odours and drying out. Leftovers keep well for up to 3 days; if you plan to store longer, slice and wrap individual portions in plastic wrap and foil, then freeze for up to 3 months. To reheat frozen slices, thaw overnight in the refrigerator and bring to room temperature for 20–30 minutes before serving. For best texture, avoid freezing whipped-cream-frosted cakes for long periods; instead freeze unfrosted layers and assemble after thawing.
Ingredient Substitutions
If you cannot source cornstarch, replace with an equal measure of cake flour (reduce all-purpose accordingly) but expect a subtle change in texture. Swap canola oil for grapeseed or light olive oil for an equally neutral flavour. For dairy-free needs, use a stable plant-based whipped topping and substitute the jam with a citrus curd; note the texture will be slightly different. If you prefer a less sweet filling, use only a thin smear of jam and add more fresh berries.
Serving Suggestions
Serve thin slices with a dusting of cocoa or a light drizzle of warm berry coulis for contrast. This dessert pairs beautifully with a cup of black tea or a glass of slightly chilled sparkling wine for celebrations. For an afternoon tea, present small slices alongside shortbread biscuits and a pot of Earl Grey. Garnish with fresh mint leaves or a few whole raspberries for a bright presentation that complements the chocolate notes.
Cultural Background
The light sponge technique has roots in traditional European and British baking, where Victorian-era cakes emphasised airiness and delicate crumbs. The shapely, thin layers are reminiscent of the classic Victorian sponge but here we’ve introduced cocoa and coffee to modernise the flavour profile. Over time, home bakers adapted the method to include variations like genoise and chiffon; this recipe sits between those styles, taking the whipped white structure from meringue and the richness of yolks for a balanced lift.
Seasonal Adaptations
In summer swap raspberries for fresh peaches or a mixed berry compote for a lighter, seasonal approach. At winter holidays, replace the jam with spiced orange marmalade and finish with candied orange peel for a festive note. For spring celebrations, fold a touch of lemon zest into the whipped cream to add a refreshing lift. The sponge’s neutrality makes it an excellent canvas for seasonal flavours and decorations.
Meal Prep Tips
Make the sponge layers a day ahead and keep them cooled and wrapped. Prepare the simple syrup and jam in advance; whip the cream and assemble on the day you plan to serve for the freshest texture. Use shallow, airtight containers when chilling to avoid crushing decorations. For parties, pre-slice and plate individual servings garnished with a single berry to streamline service and keep presentation consistent.
This cake is both a celebration of technique and an invitation to experiment — a light, comforting treat that becomes a favourite the moment you taste the contrast of airy cocoa sponge and bright raspberry filling. I hope you enjoy making it as much as I have.
Pro Tips
Always use room-temperature eggs for better volume when whipping whites and yolks.
Whip whites to stiff peaks but stop before they become grainy to avoid overbeating.
Gently fold using a spatula in wide strokes, turning the bowl to preserve air.
Brush layers with warm simple syrup to keep the crumb tender and extend freshness.
Chill the cake briefly after assembly to let the cream set for cleaner slices.
This nourishing light & airy chocolate sponge cake recipe is sure to be a staple in your kitchen. Enjoy every moist, high protein slice — it is perfect for breakfast or as a wholesome snack any time.
FAQs about Recipes
Can I bake this without a fan oven?
If you don't have a fan/convection oven, increase temperature to 347°F (175°C) and watch closely; the layers may need a few minutes more.
How do I keep the sponge from drying out?
Brush the layers generously with the simple syrup while they are cool to keep them moist; do not soak or they may collapse.
Tags
Light & Airy Chocolate Sponge Cake
This Light & Airy Chocolate Sponge Cake recipe makes perfectly juicy, tender, and flavorful steak every time! Serve with potatoes and a side salad for an unforgettable dinner in under 30 minutes.
Ingredients
Sponge Cake
Simple Syrup
Whipped Cream
Filling
Instructions
Preheat and prepare pans
Preheat oven to 320°F (160°C) fan. Line bottoms of two 8x3 inch pans with parchment; leave sides ungreased so the batter can cling and rise properly.
Mix dry ingredients
Whisk together flour, cornstarch, baking powder, cocoa, instant coffee and salt until combined and free of cocoa lumps.
Whip egg whites
Beat egg whites with white vinegar until foamy, then gradually add 1/3 cup sugar and whip to stiff, glossy peaks; set aside.
Whip egg yolks and sugar
Combine remaining sugar with warm water, add yolks and vanilla; whip on medium-high for about 4 minutes until thick and ribboning, then lower speed briefly.
Incorporate oil and fold
Stream oil into yolk mixture while mixing, fold half the whites into the yolks to loosen, sift in dry mix and fold until just combined, then fold in remaining whites.
Bake and cool
Divide batter between pans, tap out bubbles and bake 20 minutes. Tap pans and invert onto a wire rack while still in tins to cool; release after about an hour.
Brush with simple syrup
Stir 1/4 cup sugar into 1/4 cup boiling water until dissolved and brush generously over tops and sides to keep the sponge tender.
Prepare chocolate whipped cream
Whip cold heavy cream with powdered sugar, cocoa and vanilla to stiff peaks; avoid overwhipping to prevent graininess.
Assemble and decorate
Spread a thin layer of raspberry jam on the first layer, add halved strawberries and chocolate whipped cream, top with the second layer and finish with more cream and fruit.
Last Step: Please leave a rating and comment letting us know how you liked this recipe! This helps our business to thrive and continue providing free, high-quality recipes for you.
Nutrition
Did You Make This?
Leave a comment & rating below or tag
@natasharecipes on social media!
Categories:
You might also like...

Garlic Bread Ritz Bits
Cheesy Ritz Bits tossed in garlic butter, Italian herbs, and parmesan, then baked until golden and irresistibly crisp — a perfect party snack or weeknight nibble.

Cucumber Melon Splash: Discover This Refreshing Drink Recipe!
A cooling and bright beverage made with fresh watermelon and cucumber, sparkling water, and a hint of lime. Perfect for hot afternoons and easy to make ahead.
Creamy Tuscan Garlic Tortellini Soup: Your Cozy Italian Escape
A warm, vegetarian Tuscan-style soup with cheese tortellini, sun-dried tomatoes, spinach and a silky garlic cream — ready in just 30 minutes.
Did You Make This?
Leave a comment & rating below or tag @natasharecipes on social media!
Rate This Recipe
Share This Recipe
Enjoyed this recipe? Share it with friends and family, and don't forget to leave a review!
Comments (1)
This recipe looks amazing! Can't wait to try it.
Comments are stored locally in your browser. Server comments are displayed alongside your local comments.
Hi, I'm Natasha!
What's Popular

30-Minute Meals!
Join to receive our email series which contains a round-up of some of our quick and easy family favorite recipes.